

What is the sterilization Of Surgical Instruments?
Sterilization is a process aimed at eliminating or destroying all microbial life forms, including bacteria, viruses, fungi, and spores. Sterilization’s primary objective is to completely eradicate potentially harmful microorganisms from surfaces, substances, or objects, rendering them free from any viable pathogenic agents.
Various methods are employed for Sterilization, depending on the nature of the items or surfaces being treated. Common sterilization techniques include autoclaving, chemical Sterilization, radiation, and filtration. Autoclaving, involving high-pressure steam, is widely used for heat-resistant materials, while chemical Sterilization employs disinfectants or sterilizing agents. Radiation methods, such as gamma radiation or ultraviolet light, target specific microorganisms, and filtration physically removes microbes from liquids or air.
Sterilization is a critical practice in healthcare settings, laboratories, and various industries where maintaining aseptic conditions is imperative to prevent the spread of infections and ensure product safety.
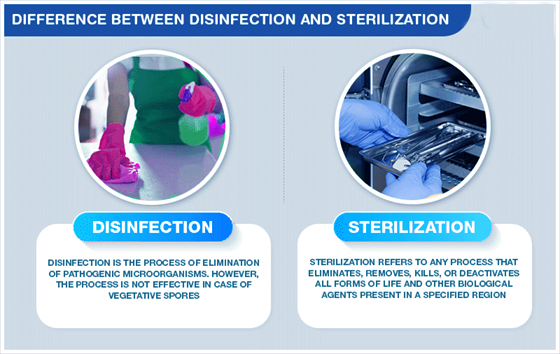
Sterilization VS Disinfection Of Surgical Instruments
Sterilization:
- The primary goal of sterilization is to eliminate or destroy all forms of microbial life, including bacteria, viruses, fungi, and spores. The result is a sterile environment or object free from any viable microorganisms.
- Methods include autoclaving (steam sterilization), dry heat sterilization, chemical sterilization, radiation (gamma, UV), and filtration.
Disinfection
- Disinfection aims to reduce the number of pathogenic microorganisms on surfaces or inanimate objects to a level considered safe for public health. It does not necessarily achieve complete elimination of all microbes.
- Methods include chemical disinfectants (such as bleach or alcohol), UV light, boiling, and certain types of filtration.
- Disinfection methods are generally less harsh than sterilization methods.
STERILIZATION INSTRUCTIONS
Sterilization is a critical process that requires meticulous adherence to standardized procedures to eliminate all forms of microbial life completely. The specific instructions for Sterilization can vary based on the method employed. Here, I will provide general instructions:
Consult Instructions:
- You have bought a quality instrument for the best results. Please observe the following instructions.
- The following instructions are for all reusable medical devices supplied by Jalal Surgical unless otherwise stated on the product’s packaging.
- These instructions are intended for use only by persons with required special Knowledge & training.
Regulations:
- These instructions offer general guidelines; in addition, please observe national regulations & standards.
- For patients with CID, HIV, Hepatitis, or any other contagious diseases, observe the relevant national regulations concerning the reprocessing of products.
- Always follow the instructions of the cleaning agent, disinfectant, and equipment manufacturer.
- The operator is solely responsible for the success of the selected procedure and the validation of its effectiveness.
Safety First:
- Special care must be taken to ensure personal safety.
- Only a fully trained person must perform these procedures.
- Protective clothing, gloves, and eyewear must be worn by local health.
- Sharp instruments must be handled separately in baskets or cassettes.
- Manufacturer’s instructions and guidelines must be followed.

WARNINGS:
- Follow instructions and warnings issued by manufacturers of any decontaminants, disinfections, and cleaning agents. Wherever possible, avoid using mineral acids and harsh, abrasive agents.
- No part of the process shall exceed 140°C.
- Some sensitive materials (e.g., Aluminium) are damaged by high alkaline solutions (pH>10).
- Devices with long, Narrow Cannulas, Hinges, and blind holes require particular attention during cleaning.
Reprocessing Limitations:
> Repeated processing can have a minimal effect on instruments; the end of an instrument’s life is normally determined by wear and damage.
> Any specific limitations on the number of reprocessing cycles shall be made available with the instrument.
New Instruments:
All instruments are supplied non-sterile unless otherwise stated on the label. Remove all packaging, including plastic protection sleeves on instrument tips; clean the new product manually or mechanically before the initial Sterilization.
Used Instruments:
Do not allow blood debris or bodily fluids to dry on instruments wherever possible. For best results and to prolong the life of medical device reprocess immediately. Use an enzymatic foam spray cleaner to help prevent soil from drying.
Preparation for decontamination:
Reprocess all instruments as soon as it is reasonably practical following use. Disassemble only where intended, without the use of tools unless specifically. The manufacturer provides it. Where instructions for disassembly are required, these are available with the device.
1. Cleaning
1.1 Ultrasonic Cleaning
- Use only validated and CE-marked equipment.
- Always follow the manufacturer’s instructions for use.
- Do not over-clean; the maximum immersion time of Ten minutes is recommended.
- Avoid over-crowding of instruments.
- Place heavier instruments at the bottom of the basket.
- Handle sharps (scissors, knives, chisels, etc.) separately.
- Keep joints open and ratchets unlocked.
- Rinse instruments with water to remove the cleaning solution.
1.2 Automatic Washer / Disinfector
- Use only CE-marked and validated washer-disinfector machines and low-foaming, non-ionizing cleaning agents and detergents following the manufacturers’ instructions for use, warnings, concentrations, and recommended cycles.
- Load instruments carefully, with any box joints and hinges open so that any fenestrations in instruments can drain.
- Place heavy instruments with care at the bottom of containers, taking care not to overload the wash basket.
- Place instruments with concave surfaces facing down to prevent the pooling of water.
- Use appropriate attachments to flush inside reamers and devices with lumens or cannula where available.
- Ensure that soft, high-purity water, controlled for bacterial endotoxins, is used in the final rinse stage.

NOTE!
Automated cleaning may not be suitable for all lumens and cannula, in which case, clean manually with a water jet gun, if available, and an appropriate brush (and stiletto if provided) that reaches the depth of the feature. After manually cleaning, pass all devices through an automatic cleaning cycle. These instructions have been validated using a washer-disinfector cycle validated to include two cold rinses at < 35°C, a detergent cycle and a rinse cycle both at > 50°C, a disinfection cycle operating at a temperature of between 80°C and 87°C for a minimum holding time of a minute (actual holding time over 2 minutes 50 seconds) and a 20-minute drying cycle. The detergent used was a low foaming, non-ionizing spray wash detergent cleaner (max 12 pH), and the rinse aid was a neutral PH foaming, non-ionic surfactant with isopropyl alcohol.
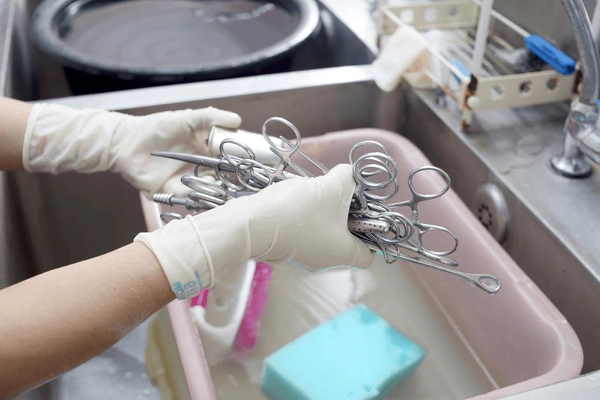
1.3 Manual Cleaning
- Use a double sink system (Wash/rinse) dedicated to instrument cleaning (not used for hand washing).
- In the first sink (Wash), submerge the instrument with an autoclavable brush and apply a CE-marked cleaning solution to all surfaces until all soil has been removed.
- In the second sink (Rinse), rinse instruments thoroughly with soft, high-purity water, controlled for bacterial endotoxins, so that the water reaches all parts of the instrument, then carefully dry or use a drying cabinet.
- Ensure that the water temperature does not exceed 35° C.
- Always brush away from the body & avoid splashing.
- Consider serrations, knurling, hinges, ratchets, and tubes. Ensure hinged instruments are thoroughly cleaned in both open and closed positions.
- Clean delicate instruments separately to avoid damage.
- Do not use steel wool or steel wire brushes.
- Use only CE Marked detergents with neutral pH (7).
Note: Manual cleaning is NOT a disinfection process
Inspection and Maintenance
- After cleaning, visually inspect all surfaces, cannulation, ratchets, joints, holes, and lumens to remove soil and fluids completely.
- Return the instrument for repeat decontamination if ANY soil or fluid is still visible.
Lubrication:
- Under the manufacturer’s instructions, apply surgical-grade lubricants to hinges, joints, and moving parts.
- Use only a non-silicon water-soluble lubricant, not an industrial type.
- Visually inspect and check: all instruments for damage and wear; cutting edges are free of nicks and present a continuous edge; jaws and teeth align correctly; all articulated instruments have a smooth movement without excess play; locking mechanisms (such as ratchets) fasten securely and close easily, long, slender instruments are not distorted; any parts fit and assemble correctly with mating components.
Remove any blunt, worn out, flaking, fractured or damaged instruments for repair or replacement.
Note: if an instrument is returned to the manufacturer/supplier, the instrument must be decontaminated and sterilized and be accompanied by the relevant documented evidence.
Packaging: All instruments are to be packed according to the method of Sterilization used following national and international standards.
2. Cold Disinfection
> Use only CE-marked products.
> Do not use bleach (sodium hypochlorite).
> Follow all manufacturer’s instructions and warnings.
> Rinse thoroughly under running water after disinfection.
Note: Disinfection is not an alternative to Sterilization.
3. Sterilization Of Surgical Instruments

3.1. Steam Sterilization Of Surgical Instruments
- Use only CE-marked and validated vacuum autoclaves
- Always follow the manufacturer’s instructions for use. Ensure instruments are fully clean, dried, and lubricated.
- Use packaging materials as specified by EN 868 and ISO 11607.
- Do not exceed the manufacturer’s stated load.
- Recommended temperature and time: 134° C-137° C 2.25 bar for a minimum of 3 minutes.
- Do not exceed 140° C.
3.2. Dry Heat Sterilization Of Surgical Instruments
- Use only CE-approved dry heat sterilizers.
- Always follow the manufacturer’s instructions for use.
- Recommended temperature: 160° C do not exceed 180° C
Note:
Other forms of Sterilization (i.e. temperature steam and Formaldehyde, Ethylene Oxide, and Gas Plasma) are available. However, always follow the instructions for use as issued by the manufacturer and always consult with them if there is any doubt over the suitability of any process used.
Storage
Ensure instruments are dry before storage and stored at ambient room temperature in dry, clean conditions.
NOTE:
IT IS THE RESPONSIBILITY OF THE PREPROCESSOR TO ENSURE THAT THE REPROCESSING, AS PERFORMED USING EQUIPMENT, MATERIALS, AND PERSONNEL IN THE REPROCESSING FACILITY, ACHIEVES THE DESIRED RESULT.
THIS REQUIRES VALIDATION AND ROUTINE MONITORING OF THE PROCESS. LIKEWISE, ANY DEVIATION BY THE PREPROCESSOR FROM THE INSTRUCTIONS PROVIDED MUST BE PROPERLY EVALUATED FOR EFFECTIVENESS AND POTENTIAL ADVERSE CONSEQUENCES.